Who is this for?
👤 User My Files, Users with edit privileges and Administrators
👁️🗨️ Available for all plans
In this article
Content expiration date
When you set an expiration date for your content, for example contents with a time-limited discount, it will be automatically removed from your Workspace after the specified date. Don't worry though, the folder or document will be moved to the trash folder where it will stay for 60 days before being permanently deleted. During this time, the folder or document will still be accessible in any existing shares.
One important thing to note is that if you upload a new document with the same name to the same folder where the deleted document was originally placed, the deleted document will be removed from any existing shares. So, make sure to keep this in mind when managing your content.
How to set an expiration date
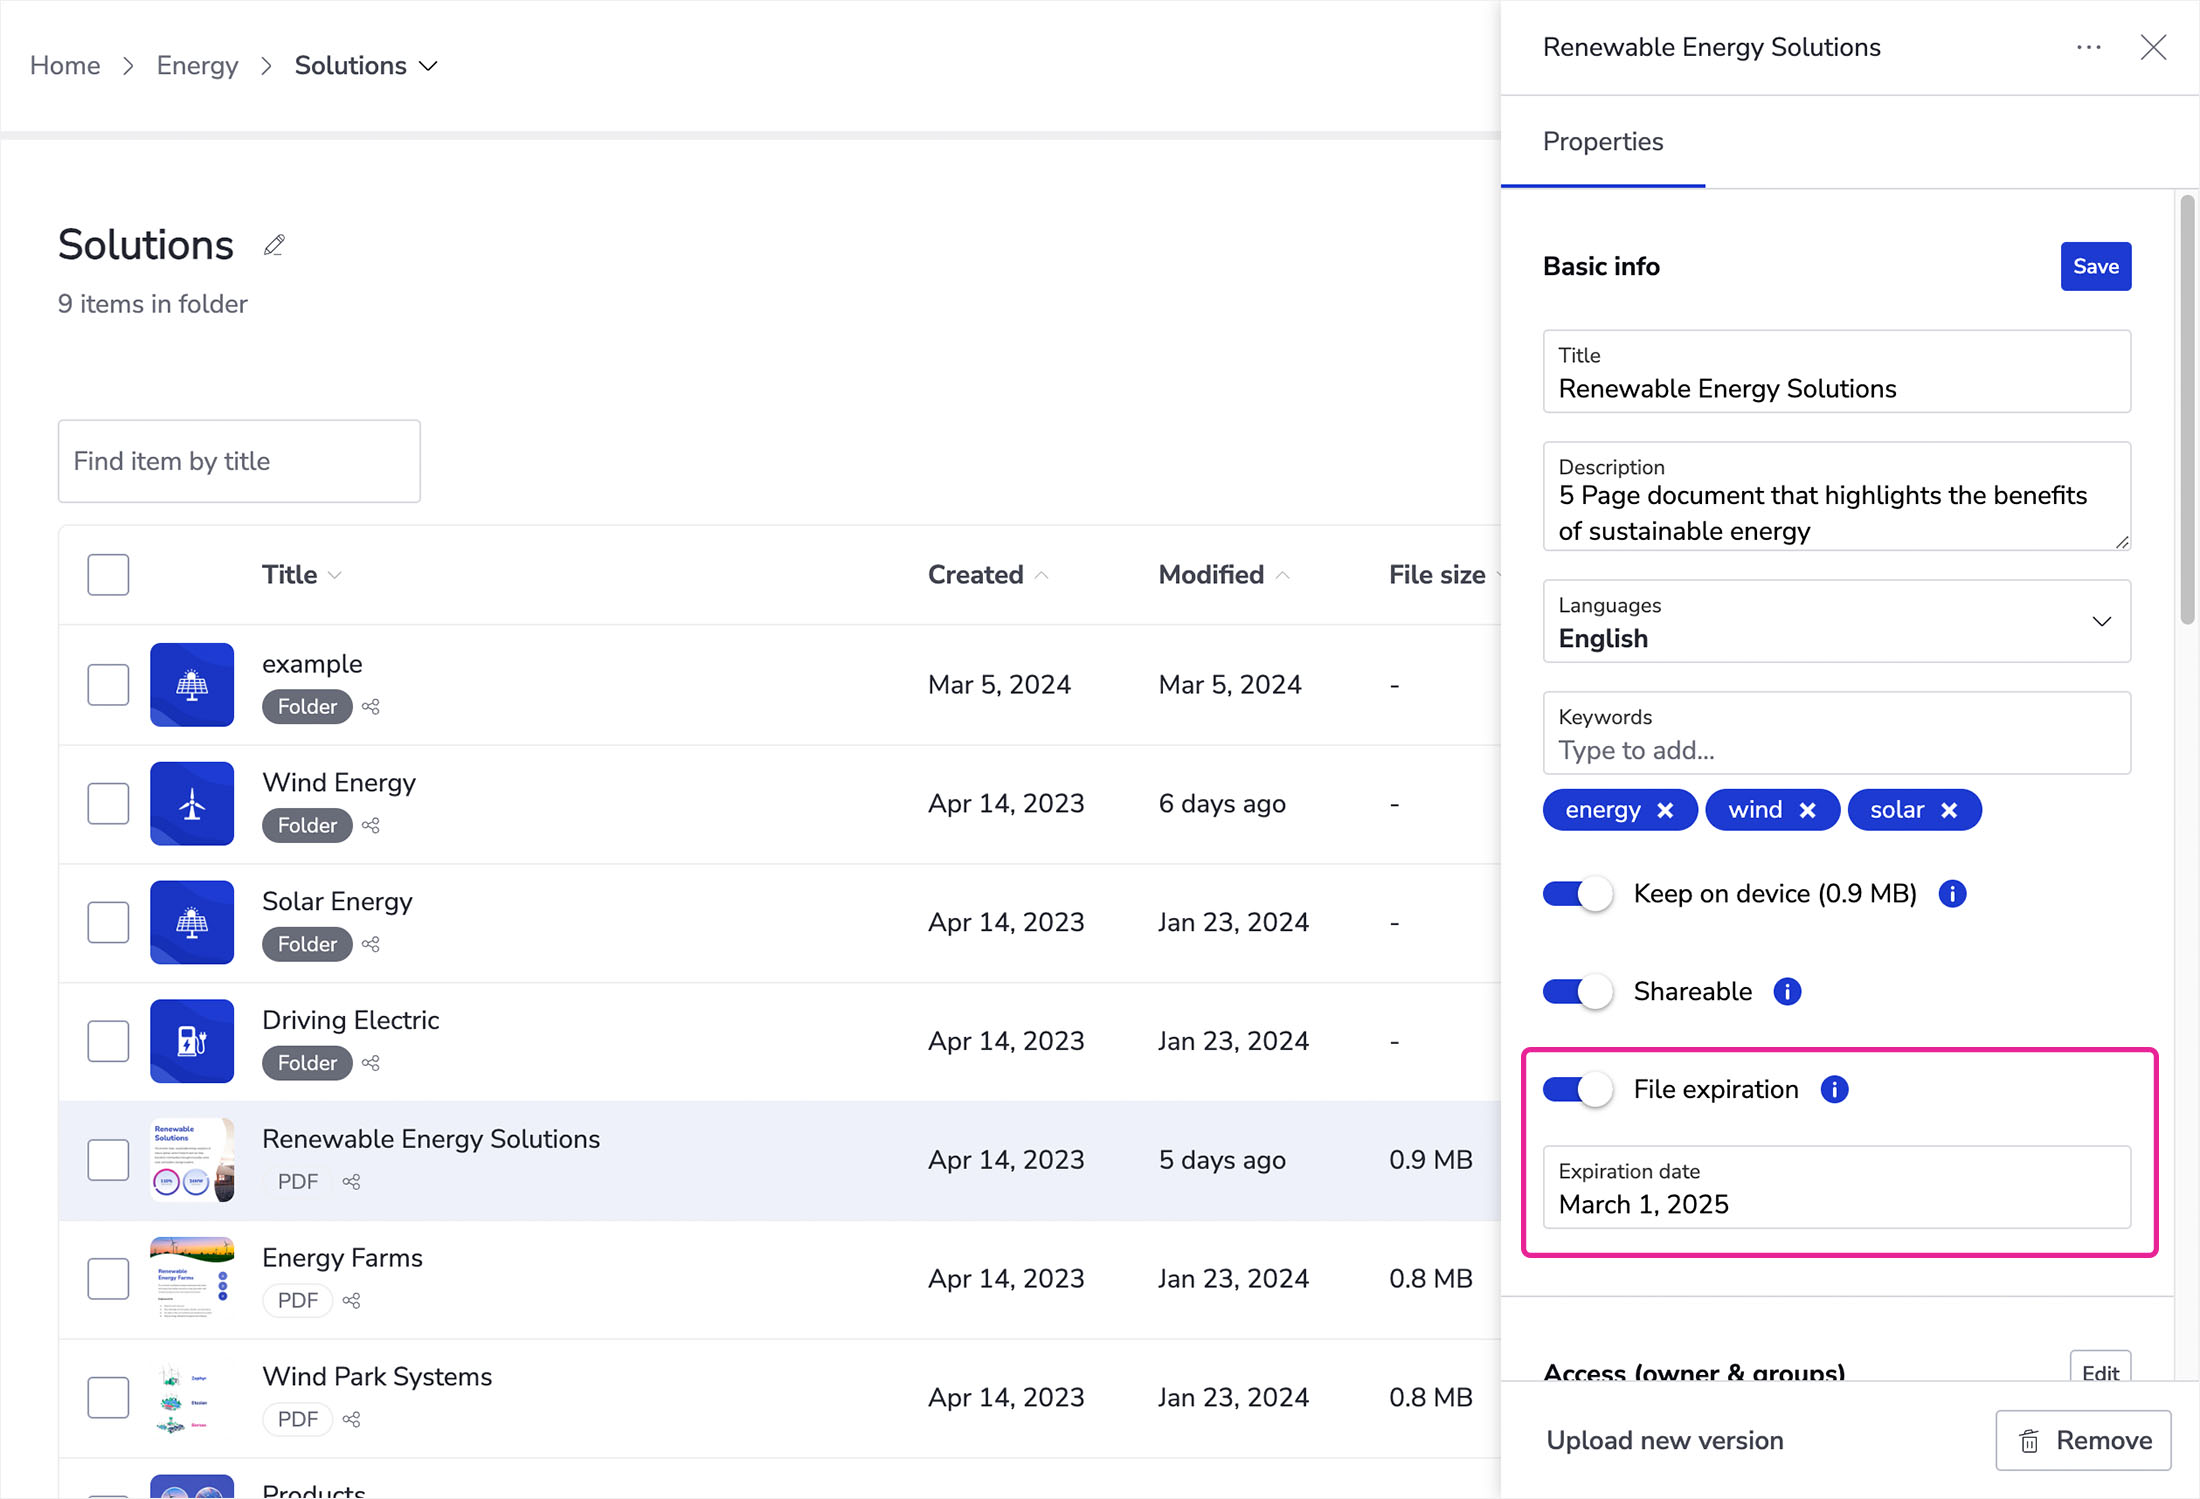
- In the Showell App for Web, Open 'Edit'-Mode and navigate to the content (folder or file) you would like to set an expiration date
- Go to the folder/file's settings
- Toggle the File Expiration option to ON and choose a date
- Click Save
Manage multiple files simultaneously
When you choose multiple files by ticking the checkbox next to them, you can easily apply actions to all the chosen items at once. This feature allows you to set expiration dates for multiple documents simultaneously.
Once the checkboxes are ticked, you'll see managing options at the bottom of your screen. Click the 3 dots and choose 'Modify Properties' > Set expiration date > 'Save'.
For more information: Manage your Contents
💡 FAQ
Will I receive some type of warning before a file expires?
The owner of the folder/document will receive an email warning 48 hours before the removal of the folder/file and a confirmation after this has been removed.